| 🎯 What’s the goal? Have a reliable way to monitor on a regular basis all your Backlinks. | ⚠️ Why does it matter? It's a good idea to set up link monitoring to know if your content is earning links or if your link building campaigns are working. And also, to monitor the quality of those links. |
| 🏁 What’s the result? Link monitoring tools are crawling the internet looking for links to your site and let you know whenever there's a new link (or a change on existing links). | ⌚ When do you do this? Ideally, as soon as you put your website online. |
| ✅ Any special requirements? N/A. | 🙋♂️Who should do it? Owner of the website or the person in charge of analytics. |
👉 Where this is done: Using Monitor Backlinks, Ahref, or Google Search Console web page.
⏳ How long will this take? about 10 minutes
In 10-min you’ll be able to analyze and track your backlinks

Environment setup:
- We recommend that you use the Google Chrome browser to navigate the web.
Setting Up Backlinks Monitoring using MonitorBacklinks
Creating MonitorBacklinks Account
- Go to the MonitorBacklinks website.
- Click on “Start your free trial”.

The trial is available for 30 days.
After that time, you will be able to choose a payment plan suitable for you.
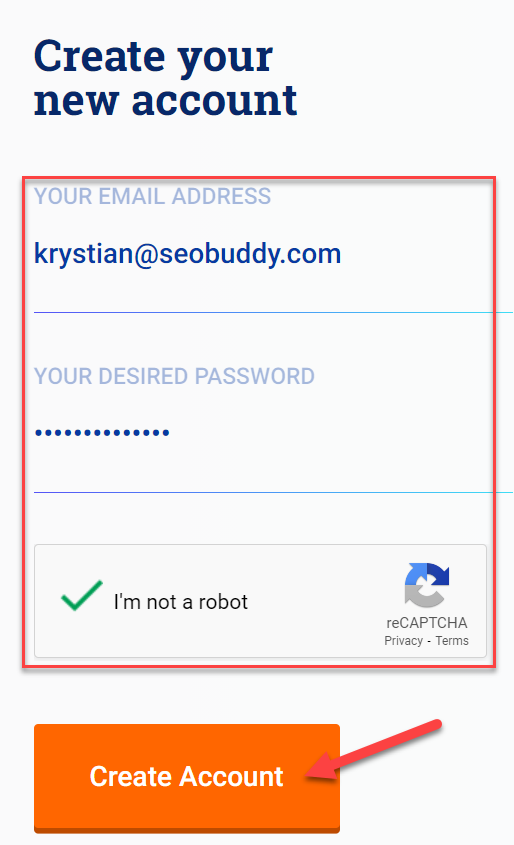
- Enter “Your Email Address”, and come up with “Your desired password”. Check that you are not a robot and click on “Create Account”.
- Now you have to confirm your email address.

- Open your mailbox. You should find mail from “Monitor Backlinks”. Open it.

- Click on the provided link to confirm your email...

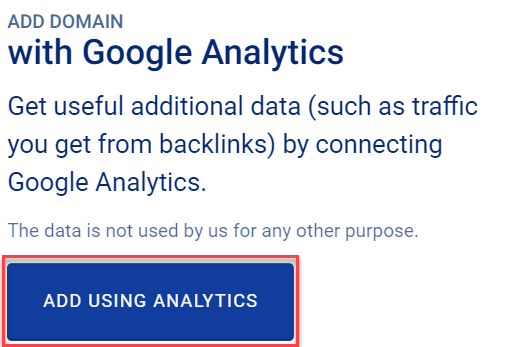
- ...and you will be redirected back to Monitor Backlinks site. Here you have to add your domain for monitoring. You can add it using Google Analytics(1), or manually(2).

Adding your domain using Google Analytics
Step prerequisites: You need to have Google Analytics set for your website for this step. Check our SOP-003 and SOP-004 to find out how to do that.
- Click on “Add using Analytics”.
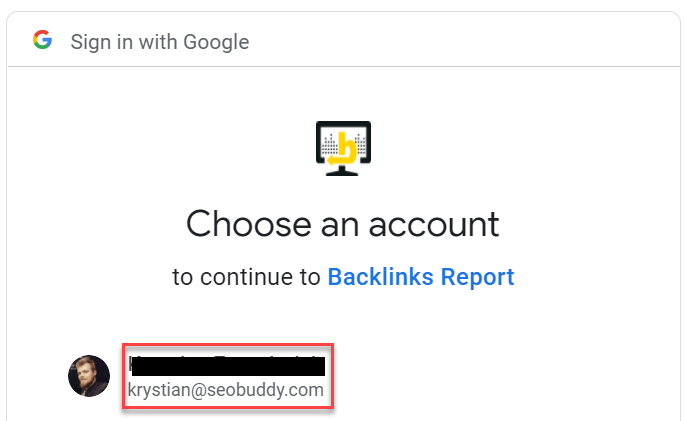
- Choose Google Account associated with your Google Analytics.
- Click on “Allow”.

- Choose desired Google Analytics “profile”.
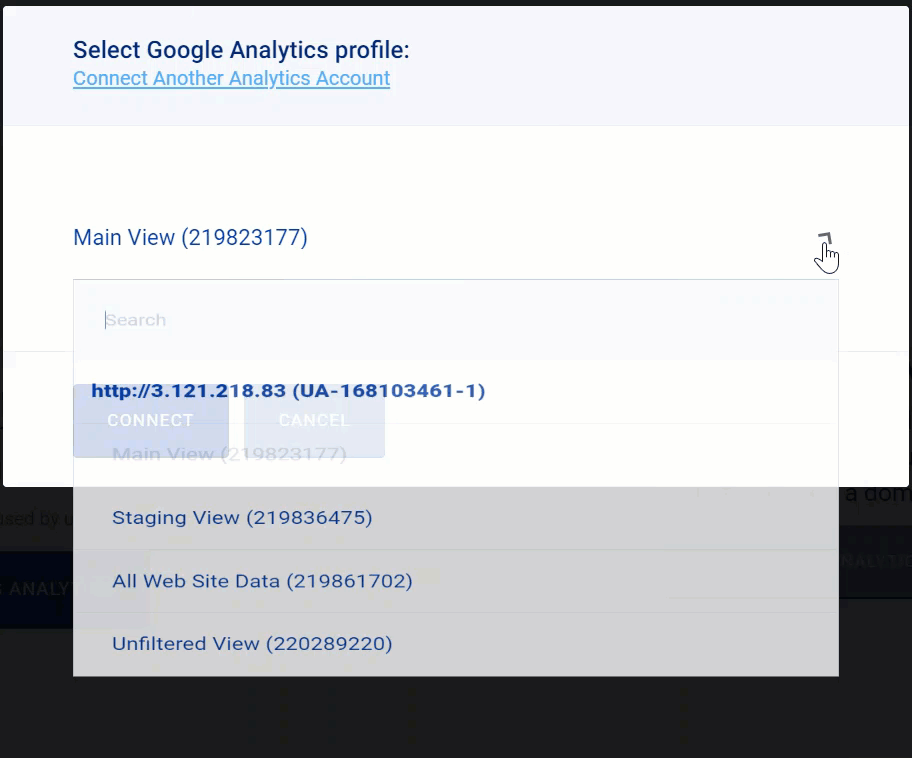
- Click on “Connect”.

Optional Steps
After you connect/add your domain you will be presented with some additional (optional) steps. You can choose to configure them or skip them.
- Add Competitors
You can add competitors to your website. It will allow you to check their backlinks and keyword rankings.

- Add Keywords
You can add keywords to your rankings to see how they are ranking when you get new
links.
Adding your domain manually
- Choose “Add without Analytics”.

- Enter your website URL and click on “Add domain”.
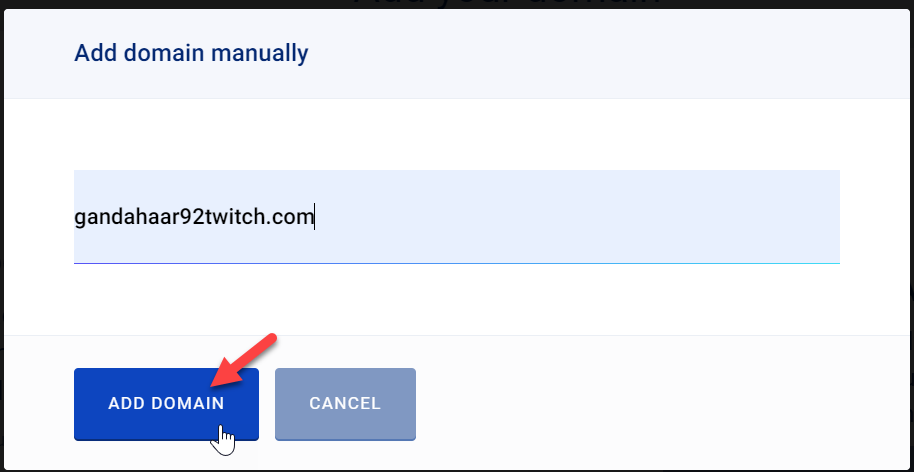
- Now you only need to skip or fill in optional steps mentioned in the earlier part of this SOP.
No matter which method you choose to add your domain to, you will be able to check your backlinks monitor by selecting “Backlinks” from the top menu.

You have to wait for about 24h for your data to appear.

You can also add links manually or by uploading a list.

Setting Up Backlinks Monitoring using Ahrefs.com
Ahrefs.com is a paid service but it is one of the best solutions on the market.
If you decide to use it simply create an account and choose a suitable plan.

- Go to Ahrefs.com
- Once you create your account, enter your credentials and click on “Sign in”.

- When you will be moved to your dashboard, click on “New project”.

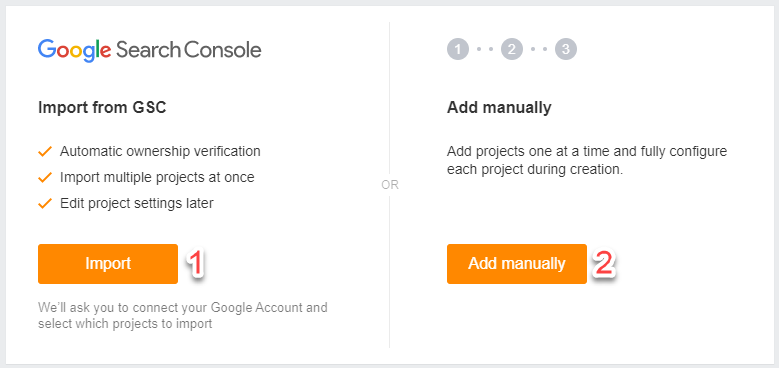
- Now you will be able to choose “Import”(1) your project from Google Search Console or “Add manually”(2).
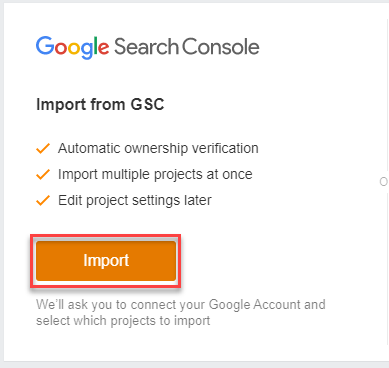
Importing an existing project from Google Search Console
- If you choose to import your project from GSC, simply click on “Import”.
- Choose your Google account associated with your GSC.

- Grant Ashrefs required permissions by clicking “Allow”.

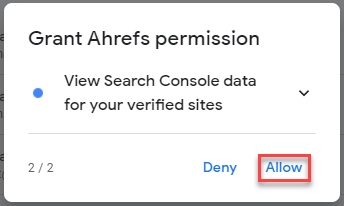
- Confirm your choices by clicking “Allow” one more time.

Your project should now be moved to your Ashrefs account.
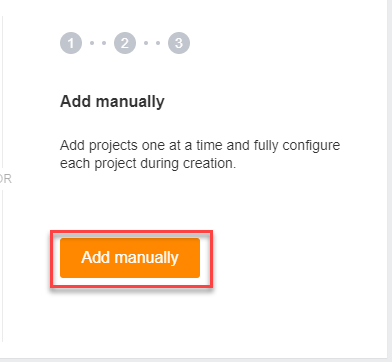
Add project manually
- Click on “Add manually”.
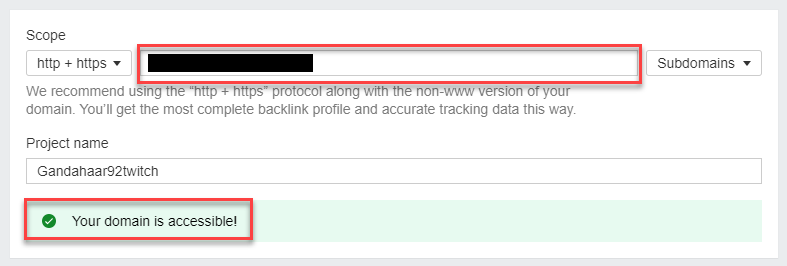
- Enter your URL (you should see that “Your domain is accessible”).
- Be sure to set “Subdomains” next to your URL as we are going to audit our backlinks.
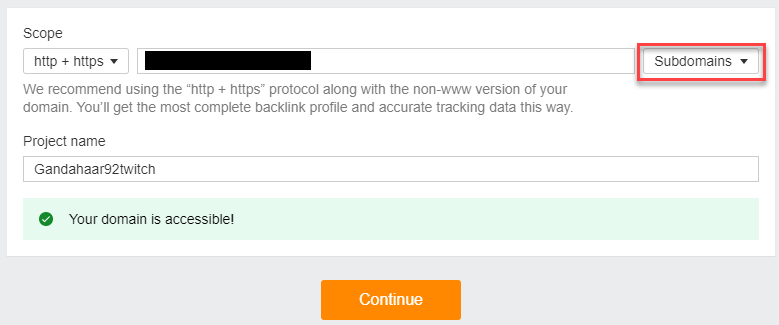
- Click on “Continue”.

- Now you have to verify your domain ownership.

Verify with Google Search Console
- If you have Google Search Console enabled for your site this is the easiest and recommended solution.
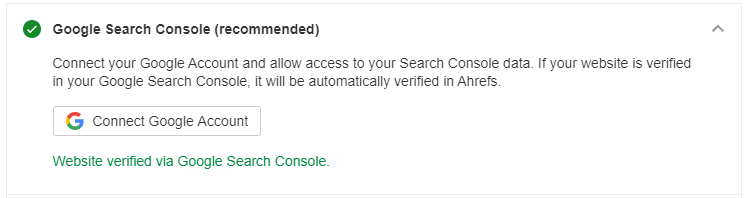
- Simply click on “Connect Google Account”.

- Choose your Google account associated with GSC.

- Then click on “Allow”.

Verify with DNS record
- If you choose to verify your ownership using DNS record you have to add TXT record (provided below that option) below the DNS configuration within your domain provider DNS settings.
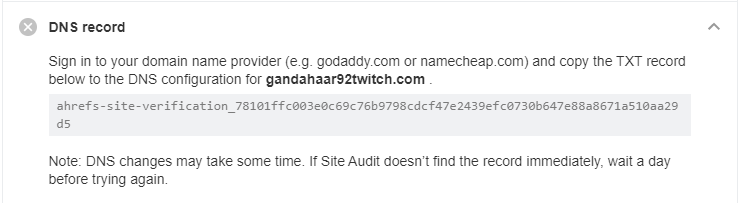
Remember that this method may take some time to process.
Verifying by uploading HTML file
- If you choose to verify using that method, you should download the provided HTML file and upload it to your server (you should ask your developer to upload your file to your server).

Verifying using HTML Tag
- If you choose to proceed with this method you have to put the provided meta tag within your homepage’s code. It should go in the section, before the first section.

Verifying using meta tag on WordPress site
- Log in to your WordPress Admin Panel (yourdomainname.com/wp-admin).

- On the left-side menu choose “Appearance”.

- Then click on “Theme Editor”.

- From the list on the right side choose “Theme Header”.

- Then the meta tag provided by Ahrefs is just below the “” line.

- Click on “Update File”.

After successful verification, you will be granted with “Ownership verified” message

- After verification, click on “Continue”.

Setting audit options
- In the “Schedule” tab you can set your desired setting on when to run audits (set according to your needs).

- In the “URL sources” tab, be sure to check “Backlinks”.

- Leave options in the “Crawl settings” tab unchanged.

- Click on “Continue”.

- In the next step, you can add keywords to the track. Feel free to add your keywords to the track (or leave it blank) and click on “Continue”.

- The next window will give you an opportunity to add competitors to analyze. You can add your competitors (or leave it blank) and click on “Continue”.

- After that, you will be redirected to your dashboard. You will see your website here. You have to wait some time for Ashrefs to crawl your website.

Checking your backlinks
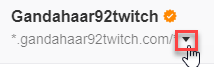
- Once Ashrefs finish crawling your website, click on the dropdown menu next to your URL.
- There you will find an entire section dedicated to backlinks.
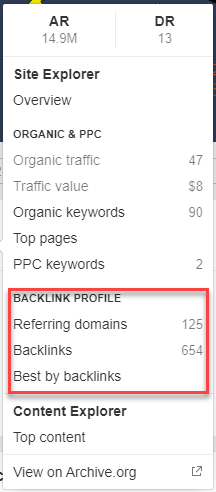
- Click on “Referring domains”.

Referring domains, also known as “linking domains,” are external websites that direct visitors to your site. These domains contain backlinks that drive traffic and views to your specific web pages.
- Here you will be able to check the list of your referring domains and analyze them.

- By clicking “Backlinks” from the “Backlink Profile section…

- ...You will produce a list of all of your backlinks. Here you can check and analyze them.

Checking your backlinks with Google Search Console
You can always check some of your backlinks using Google Search Console. To do it you need to have Google Search Console enabled for your website. Check our POST on how to do it.
- Log In to your Google Search Console
- Choose “Links” from the left side menu.

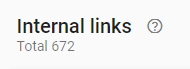
- Here you will be able to see your “External Links”.

- And “Internal Links”.
From here you have to manually look for any backlinks.
This solution is more time-consuming but it is free.
All is set! From now on, you’ll be able to monitor your backlinks!

Ready to Transform Your Productivity?
At Lil Assistance, we've perfected the art of virtual assistant partnerships. Our flexible team model means you get the right specialist for every task, managed by experienced project managers who ensure quality and consistency.
Get Started with Your VA Team