| 🎯 What’s the goal? To have a visual clue about the behaviour of your audiences, what they are doing on your page. | ⚠️ Why does it matter? To keep your content interesting and relevant for your audiences or easily accessible you should have a better understanding of how they are behaving during an online session on your page. |
| 🏁 What’s the result? HotJar tracker successfully placed on your website to collect data to create heatmaps and session recordings. | ⌚ When do you do this? When you want to analyze your audience’s interactions with your site. |
| ✅ Any special requirements? N/D | 🙋♂️Who should do it? Webmaster/owner of the website. |
👉 Where this is done: In your Wordpress admin panel and on the HotJar page.
⏳ How long will this take? about 15 minutes (then 7 days for the first data to be collected)
Let’s get started, time to check what are your audiences doing on your website

Environment setup:
- We recommend you to use Google Chrome to navigate the web.
- Access to your Wordpress Admin Panel.
Creating HotJar account
- Go to the HotJar website.
- Click on “Try it Free” in the upper right corner.

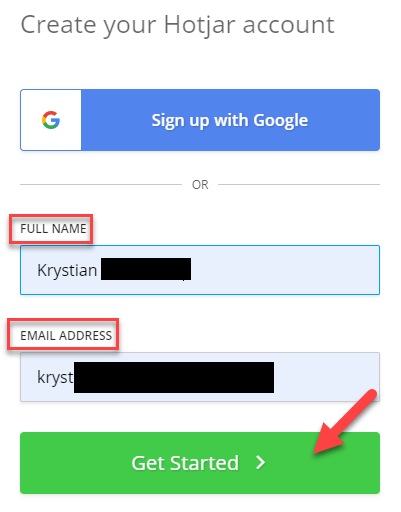
- You can choose to sign up with a Google account (1) - this will automatically fill in with your email and name, or using your email (2).

- Fill in with your “Full Name” and “Email Address”, then click on “Get Started”.
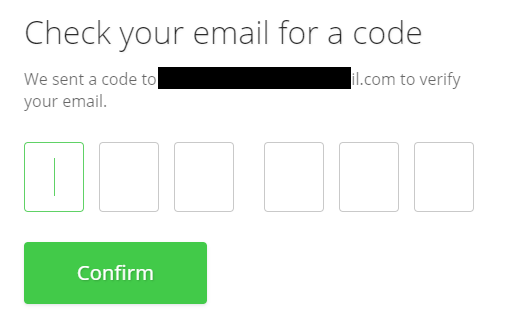
- HotJar will email you with the verification code. Once you put in the code, click on “Confirm”.
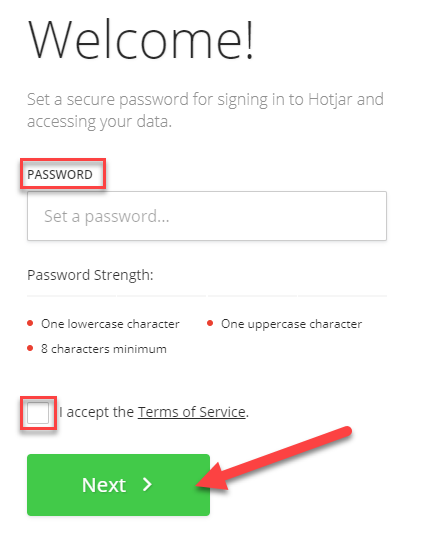
- Come up with a “Password” for your account and accept ToS by checking the rectangle next to it. Press on “Next”.
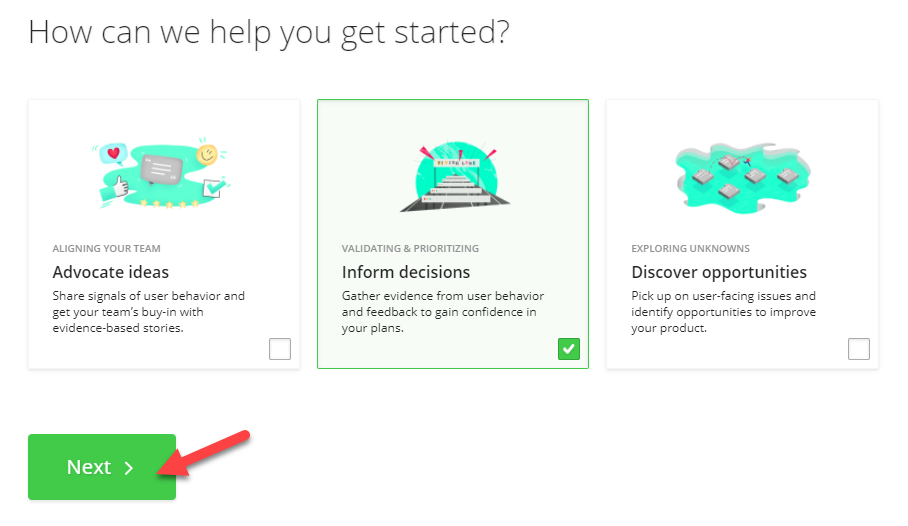
- Now you should choose what makes you join HotJar. Choose the goal that suits you best. Select from Advocate ideas(1), Inform decisions(2) or Discover opportunities(3).
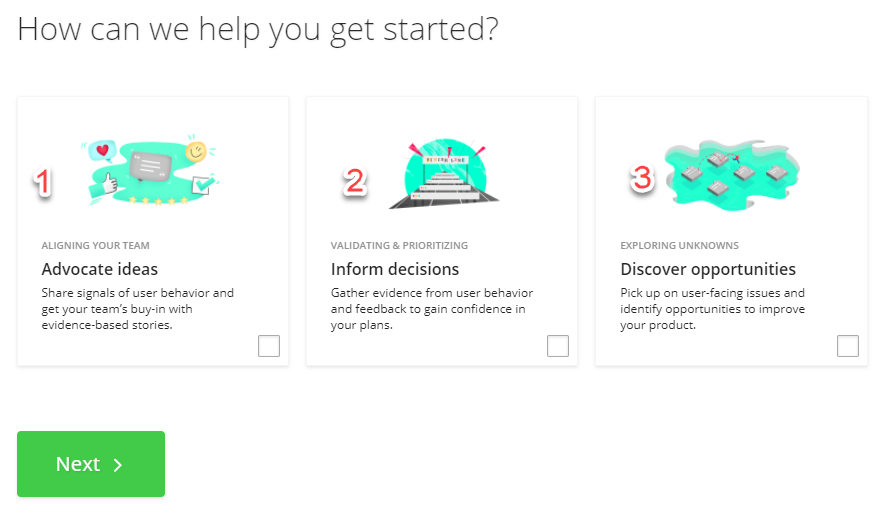
- After selection, click on “Next”.
- Now it is time to add some extra pieces of information to customize your profile.
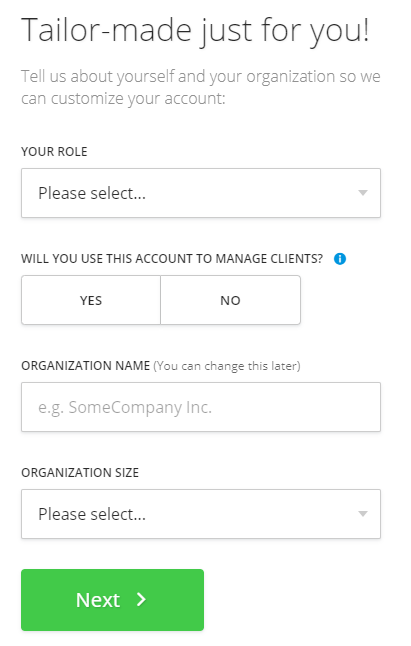
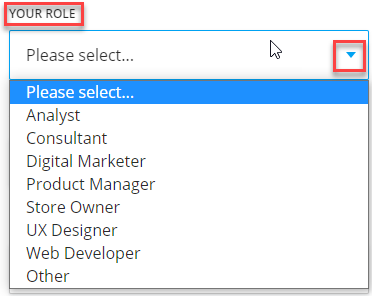
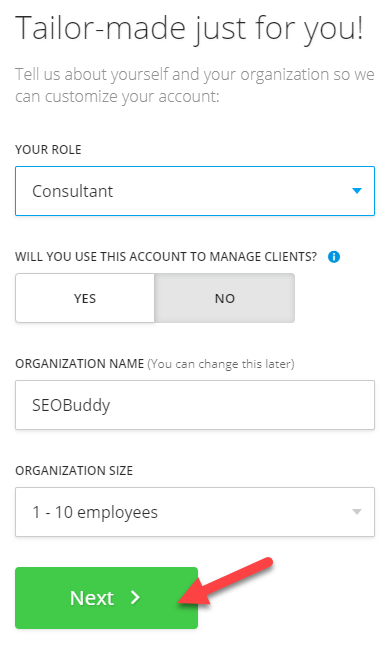
- First, select “Your Role” by clicking on the dropdown list.
- Select of you will use this account to manage your clients or for yourself.

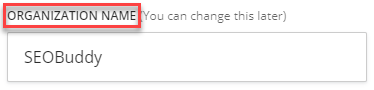
- Fill in with your “Organization Name”.
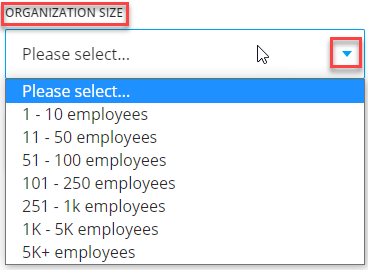
- Choose your “Organization Size” by clicking on the dropdown list.
- Click on “Next”.
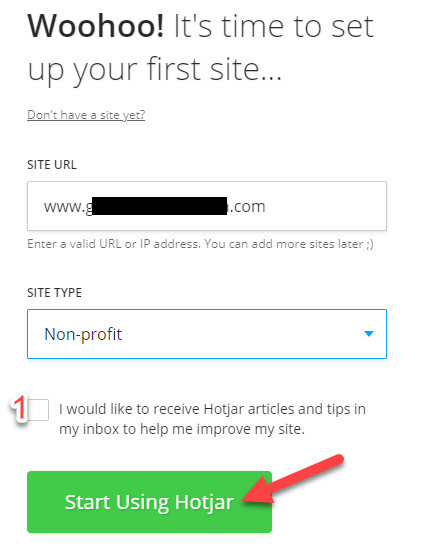
- Now it is time for you to add your site to HotJar.
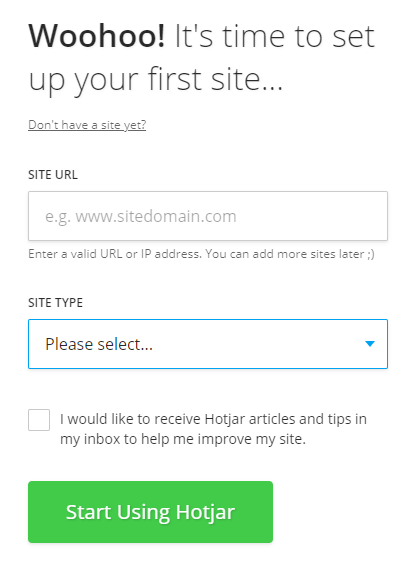
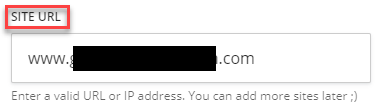
- Fill in with your “Site URL”. (If you want to add more sites later, you will be able to do it).
- Select your “Site Type” from the dropdown list.

- You can choose to receive HotJar articles by checking the box(1). Click on “Start Using Hotjar” to finish registration.
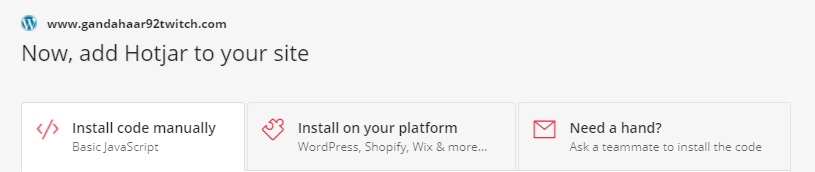
After this step, you will be presented with two methods to add HotJar to your site.
Adding HotJar to your site
Adding HotJar code manually using Wordpress Theme Editor
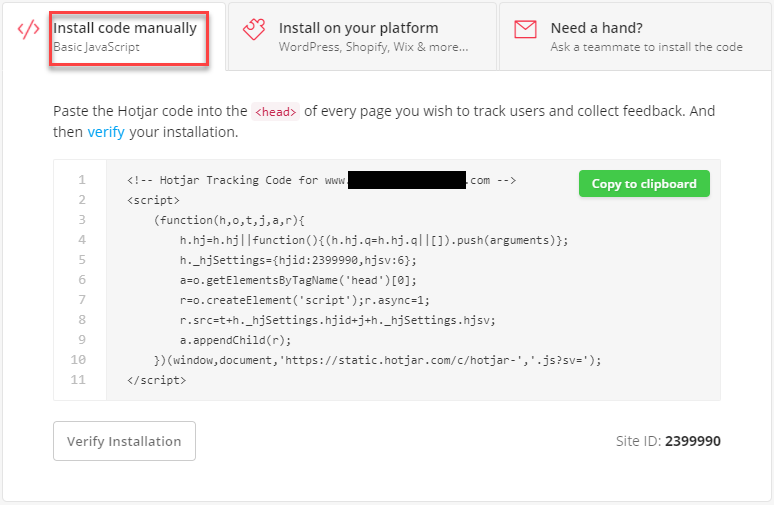
- Select the “Install code manually” tab to reveal a piece of code that you have to place on your site’s theme head section. Note that you will have to place the code on each individual page that you want to track with HotJar.
- Log In to your Wordpress Admin Panel.
- From the left side menu, select “Theme Editor” under the “Appearance” section.

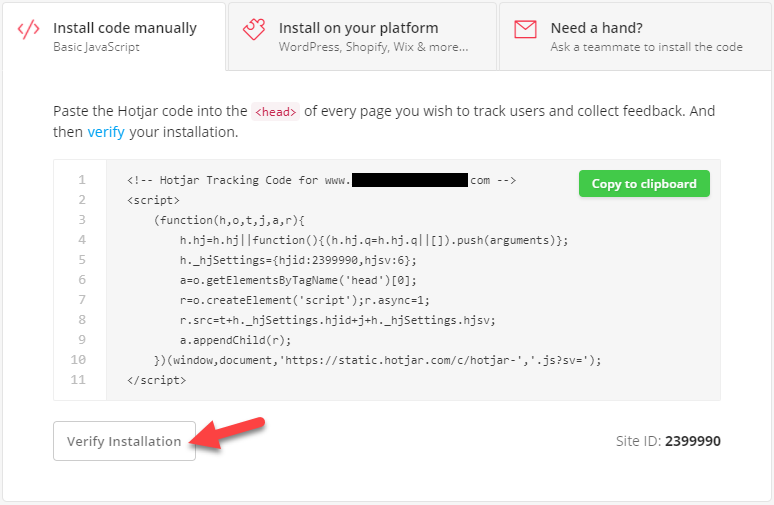
- Copy the code (indicated by the red frame) from the HotJar.
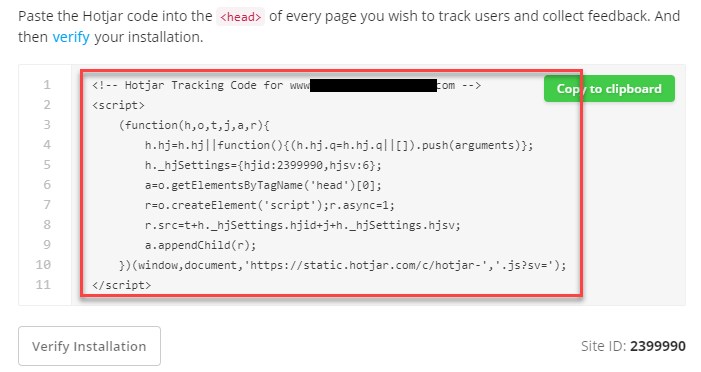
- Fin the “” section in your Theme Editor and paste HotJar code.

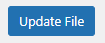
- Click on “Update File” afterwards.
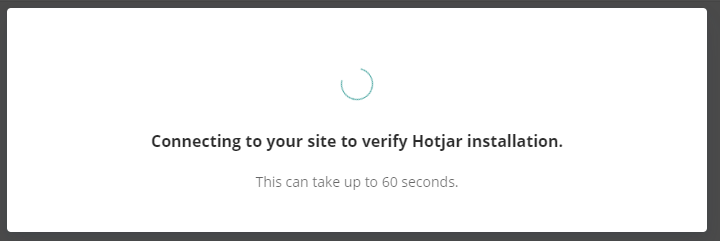
- Go back to HotJar and press on “Verify Installation”.
- Wait for HotJar to verify the installation.
- After successful installation, click on “Continue” to go to your HotJar dashboard.

Adding HotJar to your site using Wordpress Plugin
- Select the “Install on your platform” tab.
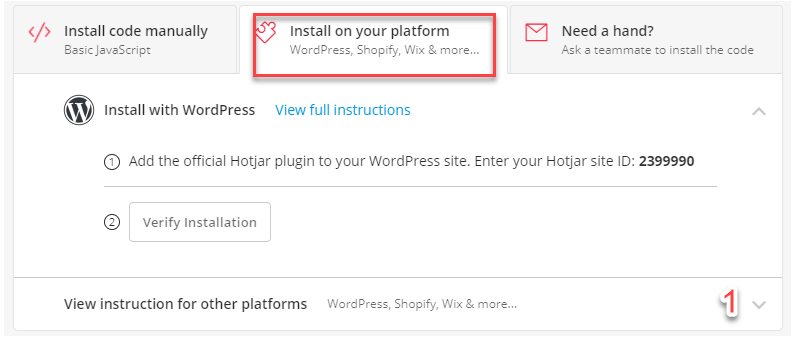
In this SOP we will cover installation using Wordpress Plugin. HotJar provides plugins for other platforms such as Shopify, Wix, etc. Each of those platforms has its’ own installation manual on HotJar (1).
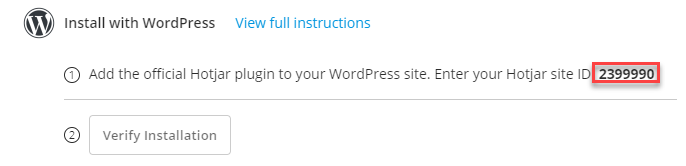
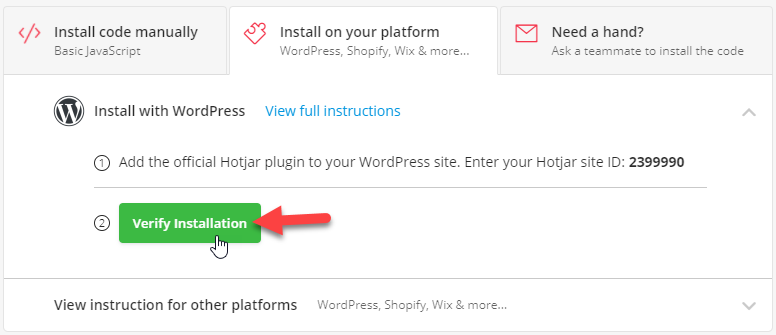
- Copy or write down your “site ID” provided by HotJar.
- Log In to your Wordpress Admin Panel.
- Choose “Add New” under the “Plugins” section of the left side menu.

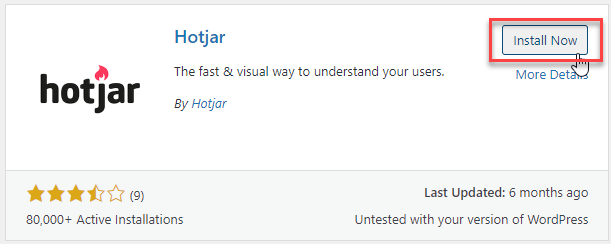
- Type in “hotjar” into the searchbox.

- You will be able to find the Hotjar plugin by Hotjar in the search results.

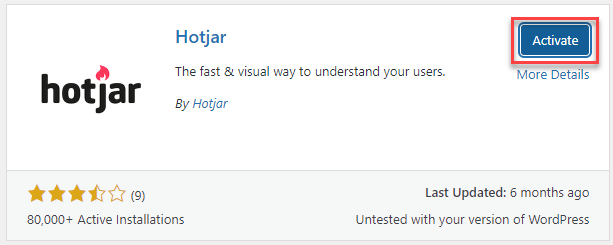
- Click on “Install Now”.
- Then, click on “Activate”.
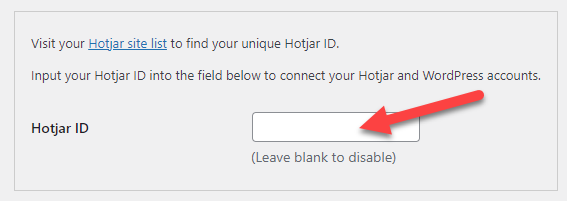
- Now, you will be able to find “HotJar” under the “Settings” section of your left side menu of the Wordpress Admin Panel.
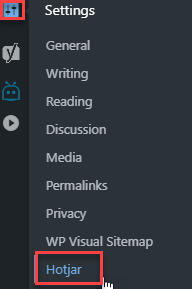
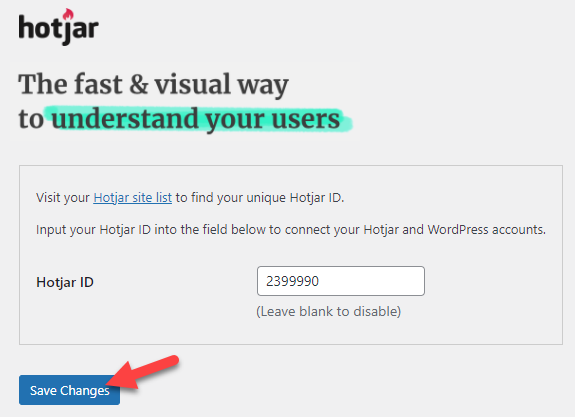
- Here, you have to place your site ID from Hotjar.
- Click on “Save Changes”.
- Go back to HotJar and click on “Verify Installation”.
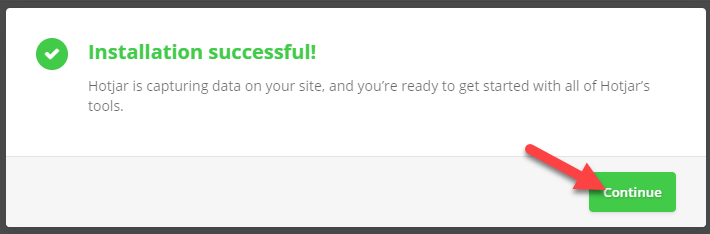
- After successful installation, click on “Continue” to go to your HotJar dashboard.
Using HotJar
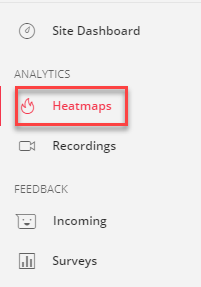
- To start collecting data, click on “Heatmaps” on your HotJar dashboard.
- Here you can enter a specific page URL or a part of a URL to suggest HotJar where to start tracking.
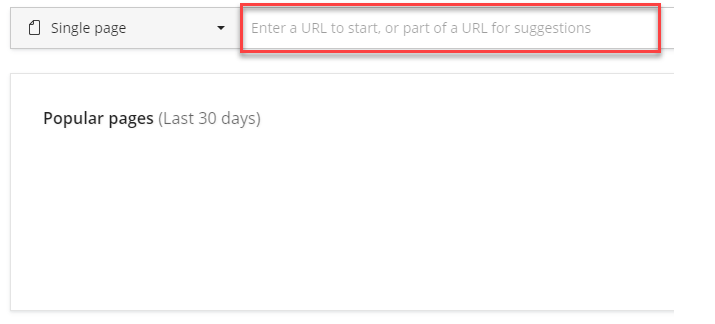
- Depending on what you typed in the previous step, you can choose if the heatmap should be only for a single page or all pages that contain/start with or end with a suggested URL.

- Then click on “View Heatmap”.

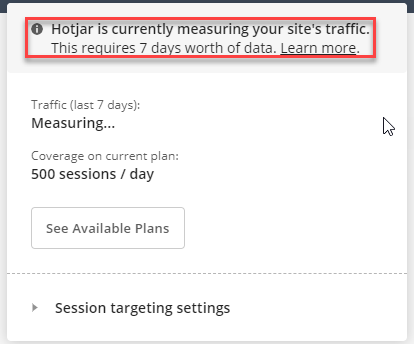
- Hotjar will run some preparations.

Note that most likely your results will be blank now. Hotjar will need some time to collect data.
- In the upper right corner, you should see the “Tracking active” indicator.

- By clicking on the indicator, you should see how much time is needed for HotJar to collect data from your website to present your results.
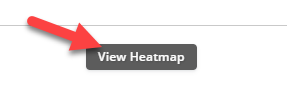
- After 7 days, go back to your dashboard and click on “View Heatmap”.
- For indicating the frequency of clicks etc, HotJar will use the Cold-Hot scale, where hot - red indicates more click/views etc.

- Now you will be able to filter your heatmap.

- Select the device (PC/ tablet/ mobile) - Select which audiences based on the user device you want to analize.
- Select which behaviour you want to analyze :
- Click

You will be able to see exact places where your audiences click on your website. By mousing over the indicator, you can receive an exact number of click in a particular place.
- Move

The dots will indicate places with the highest frequency of audiences movement.
- Scroll
The colour will indicate which part of your website is viewed the most.
- Select to view summarized data or download your heatmap.
- By selecting “Recordings” on your HotJar dashboard menu you will be able to see recordings of your audiences sessions.
- All available recordings will be listed here.
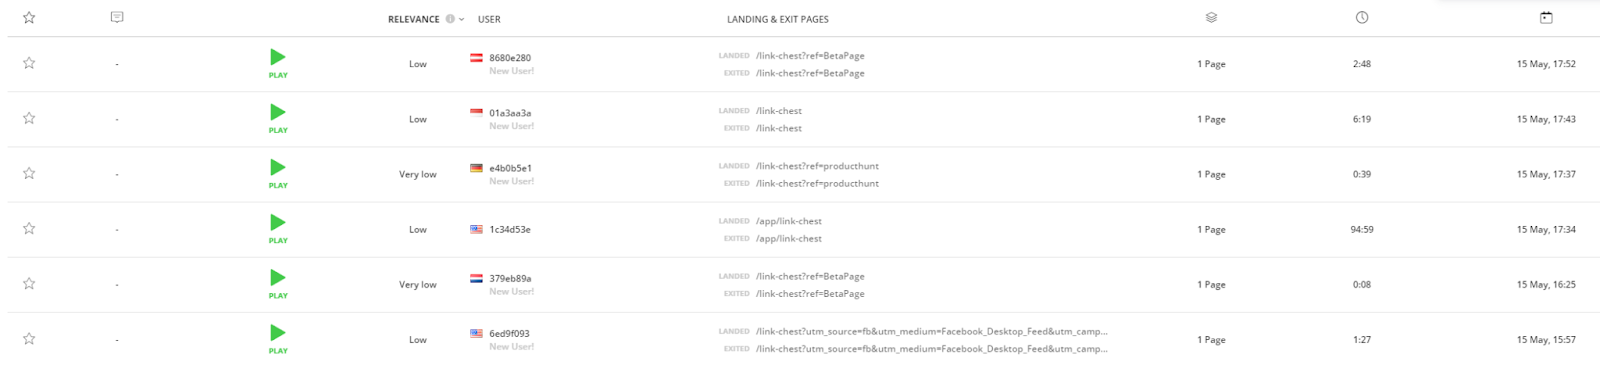
- Before playing selected recording (1), you can check its’ relevance (2), country of the audience (3), landing and exit page of the session (4), how many pages were visited during a particular session (5), length of the session (6) and the date (7).

- After playing the recording you will be presented with a useful video player that has markers that shows any events during the session.
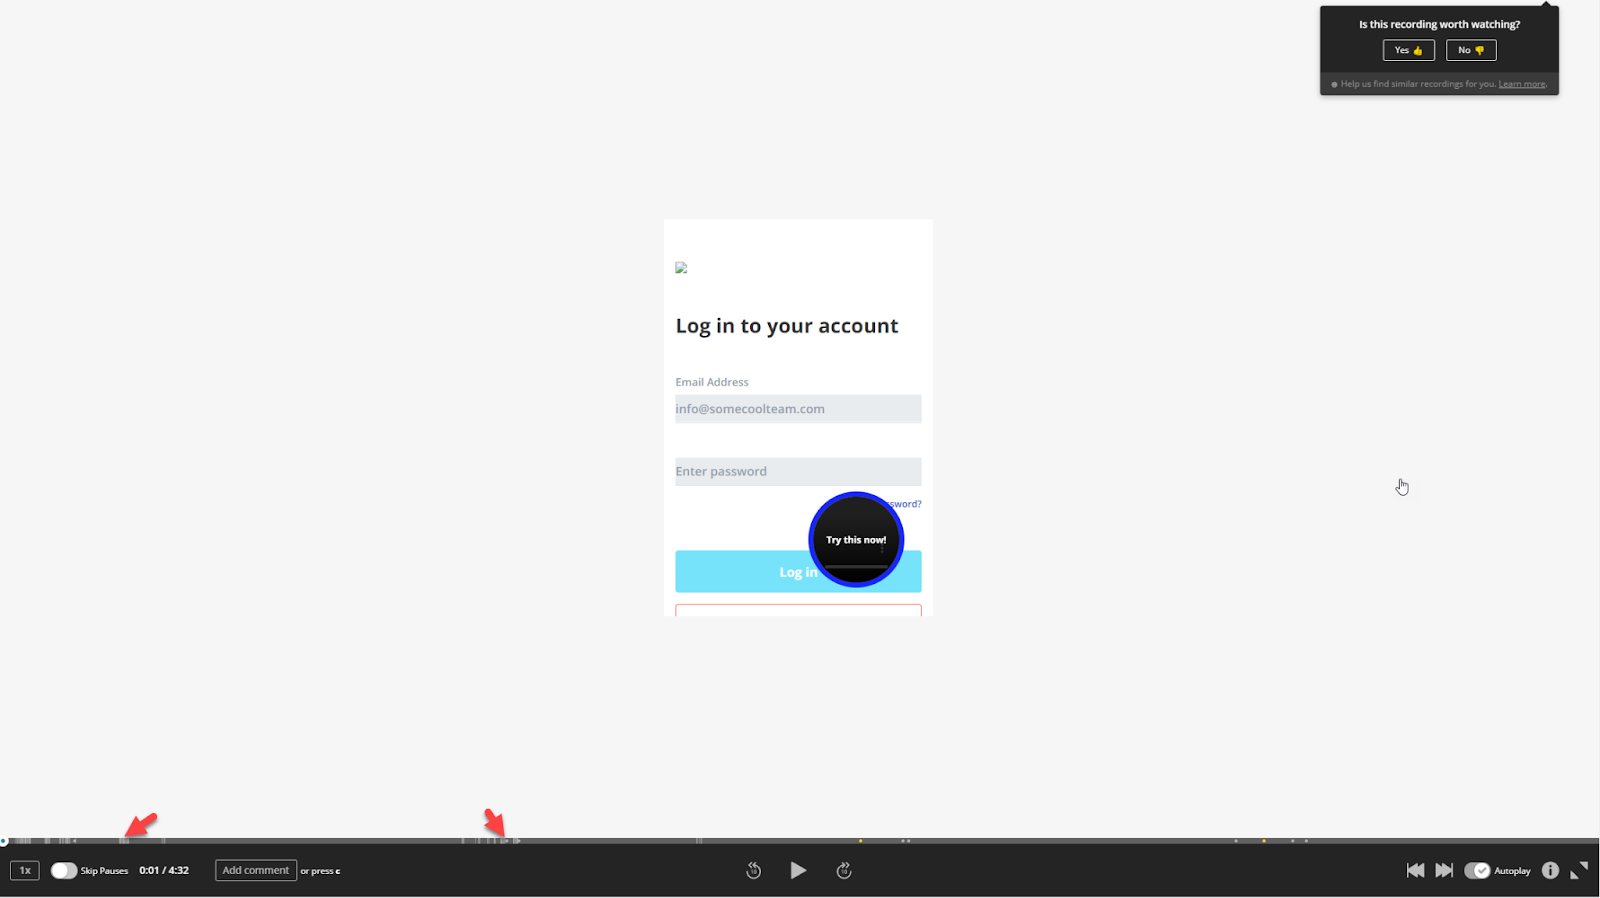
- Now you can see the behaviour of your audience.
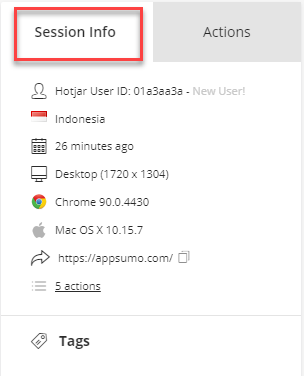
- In the upper right corner, you can check “Session Info” such as audience location or his/her web browser.
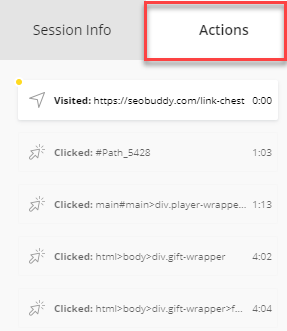
- You can also review all the “Actions” during the session.
Now you know how to check the behaviour of your audiences. Analyzing that will help you improve the construction of your website and your content. You should take your time to conclude what you will learn while reviewing each session and heatmap. The more sessions you analyze, the more accurate conclusion you will produce. Remember that sometimes something that you consider interesting and “clickable” could be unattractive for your audiences.

Ready to Transform Your Productivity?
At Lil Assistance, we've perfected the art of virtual assistant partnerships. Our flexible team model means you get the right specialist for every task, managed by experienced project managers who ensure quality and consistency.
Get Started with Your VA Team