| 🎯 What’s the goal? Install WordPress on Google Cloud Platform | ⚠️ Why does it matter?Benefit from the $300 free credits. |
| 🏁 What’s the result? Launch a new virtual machine on GCP, and install it with a WordPress software image to run your future website and lay the foundation of your new online presence. | ⌚ When do you do this? N/A. |
| ✅ Any special requirements? Credit Card Required | 🙋♂️Who should do it? N/A. |
👉 Where this is done: In your Wordpress Dashboard and Google Tag Manager.
⏳ How long will this take? 20 - 45 minutes
Now let’s start to build the foundation for your Website
Creating Google Cloud Platform account
- Go to Google Cloud Platform.
- Click on “Get started for free”.

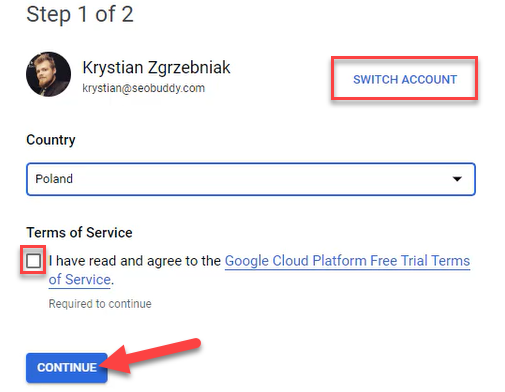
- Make sure you are using your desired Google account for creating your Google Cloud Platform account, then agree to the “Terms of Service” and press “Continue”.
- Choose “Individual” Account type.

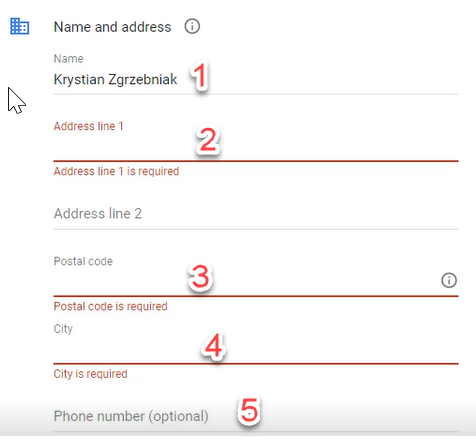
- Start off with entering your “Name”(1), then your “Address”(2), “Postal code”(3), and “City”(4). You can add your “Phone number”(5) if you want to, but this step is not required.
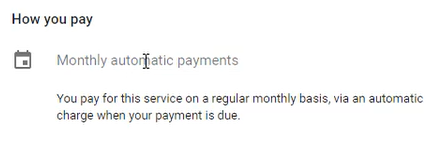
- There is information that you will pay monthly for Google Cloud, but nothing to worry about since we are going to take advantage of a free plan for starting.
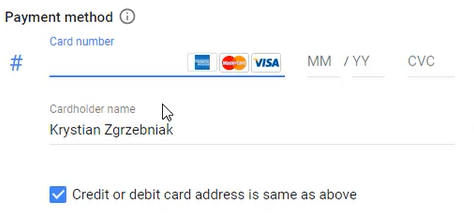
- Start typing your card number under “Payment method”. Uncheck the box if your card address is different from the one you entered in the previous step.

- Complete filling in with your credit/debit card data.
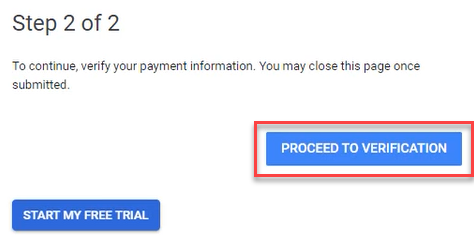
- Click on “Start my free trial”.

If the “Start my free trial” button is inactive that means you have to verify your payment information manually. We will show how to do it in the next step. If you were redirected to your “Google Cloud Platform” move to “Launching WordPress on Google Cloud” part of this SOP.
Verifying your payment information
- Click on “Proceed to verification”.
- Fill in required fields with your “First name”, “Last name”, “Contact email” and “Phone Number”.

- Under “Billing Account ID” you will find your unique ID number associated with your payment information. By using it you can check your verification status, but you will also receive an email about that.

- Upload a photo of your credit/debit card (you should hide your card number, only 4 last digits should be visible) or your bank statement by clicking on the “Choose File” button.

- Click on “Submit”.

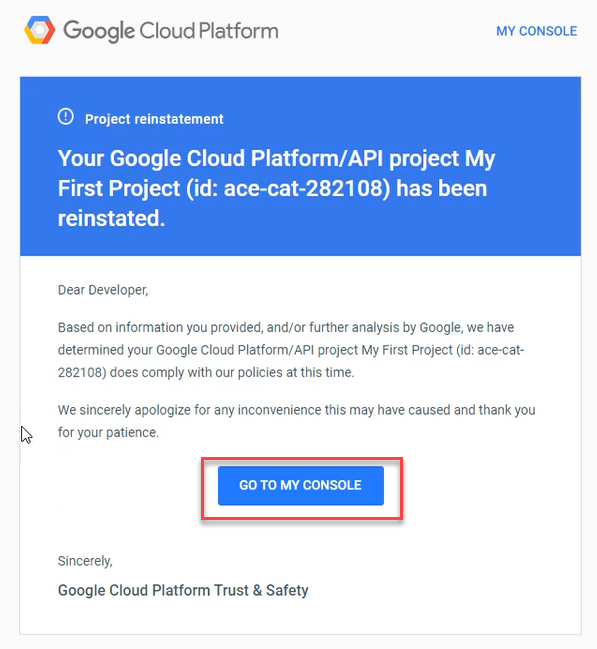
- Now you have to wait sometime for Google to verify your payment information. The time can vary from a couple of hours to over a week.
- After Google confirms your payment information you will receive an email that your Google Cloud Platform project has been reinstated. Click on the “Go to my console” button in that email.
Launching WordPress on Google Cloud
- After creating your account (or also verifying your payment information) you will be redirected to “My First Project” on Google Cloud Platform.

First of all click on “Activate” at the top of the page to claim your free 300$ credits for Google Cloud. ( Next to the button you will find information about how much credit you have and for how long)
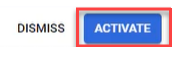
Click on “Upgrade” to confirm.

- Click on “Marketplace” on the left side menu.

- Type “WordPress” in the Search Bar.

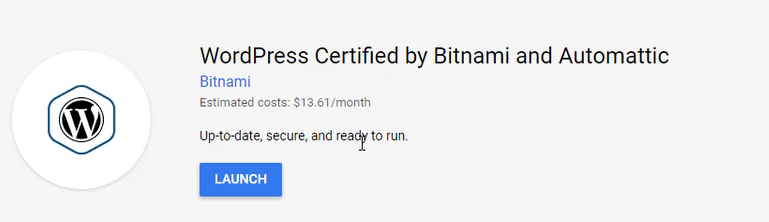
- You have to choose “WordPress” image “Certified by Bitnami”.

There will be many similar results.
Now we will explain which one you can choose to make use of your free credits.
- Click on the desired search result. You will be redirected to the chosen image page.
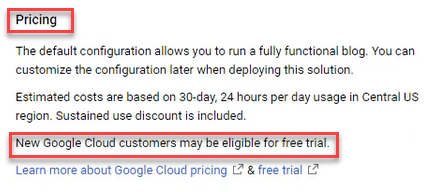
- Scroll down the page and look for the “Pricing” section. If there is “New Google Cloud customers may be eligible for a free trial” line, proceed to the next step. If there is not, go back to search results.
- Scroll up the page and click on “Launch”.

- Wait some time as your WordPress image is deploying.

- After deployment, you should come up with a “Deployment name”.

- Choose “Zone” by clicking on the dropdown list and selecting one. Make sure you choose the zone closest to your future audiences. Selecting a “Zone” means that your virtual machines will be placed in that zone. To find out specific zone data check that links https://cloud.google.com/compute/docs/regions-zones.

- Choose “small” under “Machine type”. It is enough for WordPress pages and will allow you to make the most from your free credits.

- Under the “Boot Disk” section, leave “Standard Persistent Disk” and 10 in “Boot disk size in GB”.

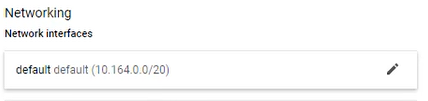
- Leave “Network interfaces” as “default”. You will later change your IP address to static.
- Don’t change anything under the “Firewall” section.

- Checkbox to accept “GCP Marketplace Terms of Service” and click on “Deploy”.

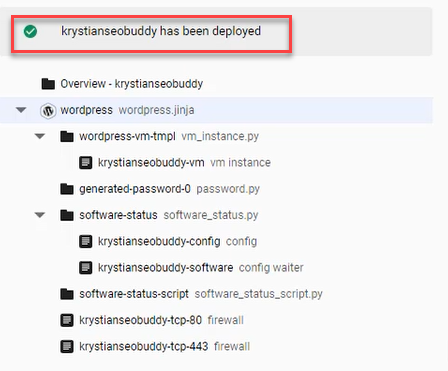
- You will be presented with the status of your deployment. “deploymentname has been deployed” message indicates that the deployment is complete.
- On the right side of the page, you will find basic data of your new website. Write down your “Admin password (Temporary)”.

- Click on the URL next to “Admin URL”.

- “Log In” with “user” and your temporary admin password that you write down two steps back.

- You are now Logged in to your WordPress Admin Panel.
- On the left side menu choose “User”.

- Then click on “Your Profile”.

- Under “Account Management” click on “Generate Password”.

- Replace the generated password with your own. This will be your password for the WordPress Admin Panel.

- Click on “Update Profile”.

Your WordPress site is now successfully launched on Google Cloud!
Setting static IP for your website
- Click on the “menu button” in the upper left corner of your Google Cloud Platform.

- In the “Compute” section click on “Compute Engine”.

- Choose “VM instances” from the list.

- Click on your instance created on Google Cloud. You will recognize it as it is the same as your “deployment name” with “-vm” at the end.

- You will be redirected to your instance information page. Click on “View details” in the “Network interfaces” section.

- Choose “External IP addresses” from the left side menu.

- As you can see, your page’s IP type is “Ephemeral”.

- Click on “Ephemeral” (Columns “Type”) and choose “Static”.

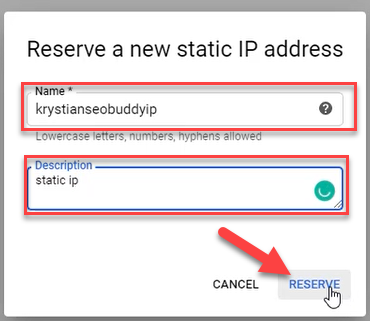
- A pop-up window will appear. You have to reserve your static IP address. Simply type a desired name in the “Name” box and add some description for it so you can easily recall why you reserved this IP. After that click on “Reserve”.
That’s it! Your website is yours to develop. It is online and ready to reach the world. If desired, you can go to your WordPress Admin Panel’s “User” section in the left menu to change the default username of your WordPress Administrator.

Ready to Transform Your Productivity?
At Lil Assistance, we've perfected the art of virtual assistant partnerships. Our flexible team model means you get the right specialist for every task, managed by experienced project managers who ensure quality and consistency.
Get Started with Your VA Team