| 🎯 What’s the goal? To set up your website Sitemap and add it to Google Search Console. | ⚠️ Why does it matter? Having a sitemap added to Google Search Console helps search engine crawlers to find more easily the content you want them to index, and to understand better how important each page of your website is. |
| 🏁 What’s the result? Sitemap created and fetched by Google Search Console. | ⌚ When do you do this? After enabling Google Search Console for your website, ideally your sitemap should be automatically updated by your SEO Plugin so you no longer have to worry about it. |
| ✅ Any special requirements? You need to have Google Search Console enabled for your website (SOP008). | 🙋♂️Who should do it? Owner of the website or the person in charge of analytics. |
👉 Where this is done: Google Search Console tool and Google Sheet to design your sitemap.
⏳ How long will this take? about 60 minutes.
Let’s get started, in an hour your website maze will no longer have secrets for search engine crawlers.

Environment setup:
- We recommend that you use Google Chrome browser to navigate the web.
- Administrator access to your WordPress website,
- Access to Google Search Console tool.
To design your sitemap you can use the Sitemap Designer Spreadsheet provided with this SOP. Go to this Spreadsheet and make a copy (File > Make a Copy) to your own Google Drive.
Getting the list of all of your URLs
- Go to xml-sitemaps.com.
- Enter your website URL in the search box and click on “Start”.

- XML Generator will crawl your website.

- After you see “Completed!” status, click on “View Sitemap Details”.

- Choose “Download All Sitemaps in a Zip File” under “Other Downloads” section.

- A “sitemaps.zip” file should be downloaded.

- Unzip the file and open the “urllist” txt file in any text editor.

- There you will see a list of all of your website URLs. You can use it to create/design your ideal sitemap.xml file.

Designing your sitemap
You should use the list of URLs you get by conducting procedure from the previous chapter of this SOP. But keep in mind it would be much better to ask your website developer or the company in charge of managing it, to generate it automatically.
- Open “Sitemap Designer Spreadsheet” provided with this SOP.
- Paste all your URLs in the “URL” column.

- Choose if an URL should be “Include in Sitemap” by selecting “Yes” or “No” from the list.

URLs should be excluded from the sitemap if they are blocked by robots.txt file. If you don’t have a robots.txt file you should check our SOP011 on how to do it. The sitemap also should not include any URLs pointing towards sensitive information such as password protected administrator area.
- If you selected “No” in the previous column, choose a “Reason to exclude” from the drop-down list.
- Assign “Priority” for each URL in a sitemap.
0.1 means low priority and 1 means the highest. Priority will determine the importance of each URL for search engines. This will help search engines to prioritize some URL above others.
- Select a “Frequency” for spiders to crawl your URL. This is not a command that will be followed by spiders. This is just a data-point they will use and take into consideration.
You should select a frequency that matches your URL updating. If your URL updates constantly (example: it shows the stock exchange rate) you should choose “Always”. Select “Never” only if your URL content is archived and will not be updated again. Select from: “Hourly”, “Daily”, “Weekly”, “Monthly”, “Yearly” if your content is updated within one of those intervals. You should avoid selecting “Yearly” even if that is the case. Choose “Hourly” only if you update your content every hour.
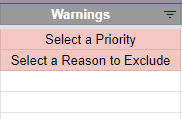
- If you didn’t select any values for columns above you should see a dedicated notification in the “Warnings” column.
- You can put any important notes for each URL in the “Notes” column.

Generating your sitemap
- Open your Sitemap Designer Spreadsheet you have created.
- Filter all URLs that you selected to be included in the sitemap.

- Open Google Chrome and go to the sitemap generator page.
- Start copying and pasting URLs from your spreadsheet.
You can paste all URL that shares the same priority and frequency
You can easily use filters on your spreadsheet to find matching ones.

- Choose desired “Priority” and “Frequency” form the list in the Sitemap Generator Page.

- After you paste all URLs with the same “Priority” and “Frequency”, click on “Add to Queue”.

- Repeat the above steps until you add all the required URLs with their desired “Frequency” and “Priority” settings.
- After you add all URLs to the queue click on “Export queue as sitemap.xml” button.

- Your browser will start downloading your XML sitemap file.
Uploading sitemap.xml file to your site (Expert)
Now you should ask your website developer to upload your file to the root of your domain (eg: https://www.yourdomain.com/sitemap.xml). This process requires root access to your site.
After uploading your sitemap.xml file you can proceed to the next part of this SOP.
If you have a “robots.txt” file you should also add a new line to your sitemap.xml file. Simply open it with any text editor and add:
“Sitemap: https://www.yourdomain.com/sitemap.xml”
Remember to replace “https://yourdomain.com” with your actual domain name.
Adding a sitemap to Google Search Console
- Go to “yourdomainname.com/sitemap.xml”.

- Copy part of a web address after “yourdomainname.com/”. This is your sitemap URL.
In some cases, the end of the URL can appear as above (sitemap_index.xml)
- Go to “search.google.com/search-console”.
- Click on “Start now”.

- Sign in with Google Account you used to enable GSC for your website.
- In the Google Search Console tool click on “Sitemaps”.

- Paste your sitemap URL.

- Then click on “SUBMIT”.

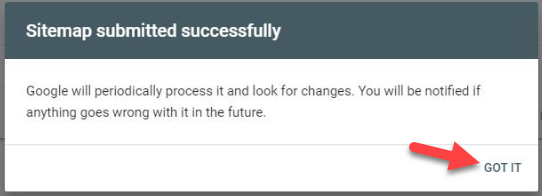
- Wait a moment for the process to finish.

- Now you should be able to see a confirmation message. Click on “GOT IT”.
- In most cases after submitting a sitemap you will see Status: “Couldn’t fetch”.

- You just need to refresh the page. Simply press “F5” on your keyboard.

This is it. You successfully created a sitemap and you added it to Google Search Console, making it easier for Google crawler to monitor the changes on your website.

Ready to Transform Your Productivity?
At Lil Assistance, we've perfected the art of virtual assistant partnerships. Our flexible team model means you get the right specialist for every task, managed by experienced project managers who ensure quality and consistency.
Get Started with Your VA Team