| 🎯 What’s the goal? Create or optimize robots.txt file for your website. | ⚠️ Why does it matter? Your robots.txt file contains an important set of rules for search engines to follow while they are crawling your website. |
| 🏁 What’s the result? Your robots.txt file allows search engines to search throughout your website as you want them to. | ⌚ When do you do this? Ideally as soon you put your website online. Then you should update your robots.txt file on a regular basis (every 3-6 month) to make it up to date. |
| ✅ Any special requirements? Administrator privilege to your website. This process only applies to Wordpress websites. You need to have installed the Yoast SEO solution Plugin on your website. Check our SOP-006 to find out how to do it. Google Search Console enabled for your website. | 🙋♂️Who should do it? The person in charge of managing your website. |
👉 Where this is done: In a text editor or Google Search Console. You can also use Yoast SEO Plugin for Wordpress.
⏳ How long will this take? about 5 minutes.
Let’s get started, in 5 minutes your robots.txt file will be created.

Environment setup:
- We recommend that you use Google Chrome browser to navigate the web.
- Access to your Wordpress admin panel.
- Google Search Console tool enabled for your website.
Checking default Wordpress robots.txt equivalent
After installation, every Wordpress blog has its default robots.txt
to prevent search engines from accessing the admin folder.
- Using Google Chrome, go to “yourdomainname.com/robots.txt”.

- You should see your file.
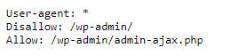
Wordpress default robots.txt setting makes your admin folder inaccessible for search engine crawlers. But it allows search access to /wp-admin/admin-ajax.php directory - it is ok - it is basically a built-in Plugin of Wordpress - it isn’t any security problem.
Create a robots.txt file
In this part of the SOP we will show you how to create robots.txt file and show you a set of rules you can add to your own robots.txt file no matter which method for editing robots.txt file you choose.
- Create a .txt document on your computer (eg: using notepad).
- Every robots.txt file should start with “User-agent: *” line.

Block a specific path (and sub-paths that follows)
- To block paths you have to add the “Disallow: /your-path” line. Replace “your-path” with the path you want to block. This line will block the selected path and all paths that follow. For example by typing “Disallow: /pictures” will disallow crawlers from accessing: “yourdomain.com/pictures” but also any sub-path like “yourdomain.com/pictures/wallpapers”.

- To block a specific file types you have to add “Disallow: /*.filetype$.” Replace “filetype” with the filetype you want to block. For example by typing “Disallow: /*jpg$ you will disallow crawlers from accessing any jpg file on your site. You can replace “*” with the name of the file if you want to block a specific file like “Photoname.jpg”.

Remember that search crawlers could potentially access any path that is not blocked with the “Disallow: /” rule.
Allowing specific sub-paths and file types to being accessed by crawlers
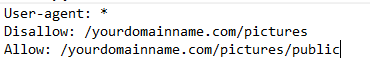
- To allow specific sub-path to be accessed you need to add “Allow: /yourpath/sub-path”. The same rule applies to file types. Instead of a path you have to type the desired filetype. For example if You want to block access to “yourdomainname.com/pictures” path but you want search crawlers to have access to “yourdomainname.com/pictures/public” sub-path you should add a new line: “Allow: /yourdomainname.com/pictures/public”.
Blocking specific crawlers from crawling your website
- Add a new line at the end of your robots.txt file.
- Add two lines:
- “User-agent: Unwanted Crawler”
- “Disallow: /”

Replace “Unwanted Crawler” with a real crawler that you want to block from accessing your site. You can find a list of active crawlers here. This step is not necessary.
REMEMBER TO SAVE YOUR FILE AS “robots.txt” AFTER CREATING/EDITING
Adding the robots.txt file through FTP or SFTP
If you are using another platform than Wordpress or you don’t want Yoast Plugin on your website you can upload robots.txt file to your website through FTP or SFTP. This is an advanced way and requires you to have access to upload files to your server.
This procedure should be done by an experienced web developer as it contains many advanced steps and execution without specific knowledge could lead to many stability problems.
This procedure is not covered in this SOP.
Creating and adding robots.txt file using Yoast Plugin
- Log in to your Wordpress Admin Panel by going to yourwebdomain.com/wp-admin.
- Enter your “Username” and “Password” and click on “Log In”.

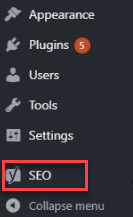
- Click on “SEO” on the left side menu.
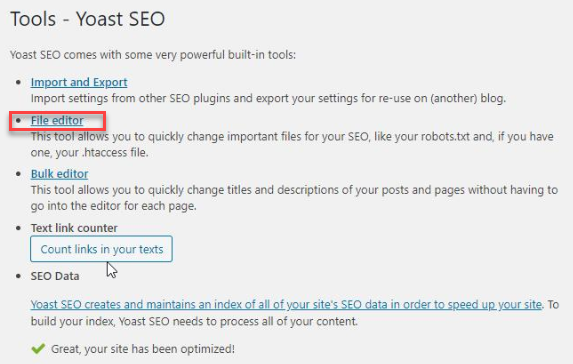
- Under “SEO” choose “Tools”.

- Click on “File editor”.
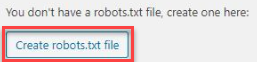
- Click on “Create robots.txt file”. As you can see, the default Wordpress setting isn’t considered as robots.txt file, that is why there is a message that “You don’t have a robots.txt file, create one here:”.
- TXT file editor will open with default settings filled in.

- You can leave default rules or write your own, using previous steps of this SOP as a guide. We highly recommend you to add a line with your website sitemap to allow search engine crawlers to search within subpages of your website.
If you don’t have any Sitemap yet, go check our SOP012. Simply add another line below the existing text: “Sitemap: https://yourdomainname.com/sitemap_index.xml”.

- Then click on “Save changes to robots.txt”.

Checking your robots.txt file
- Now check if you created robots.txt file correctly
- Go to “yourdomainname.com/robots.txt”.

- Your created and edited robots.txt file should appear.

Validating your robots.txt file
- Open Robots.txt tester on Google Search Console.
- Sign in with your Google Account.

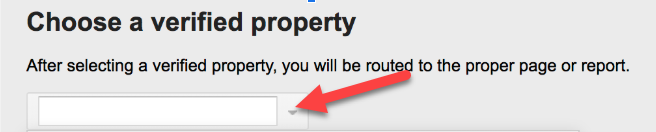
- If you have more than one property in that Google Account choose desired one form dropdown list.
- You will be redirected to robots.txt Tester tool.

- In the new tab of your browser go to “yourdomainname.com/robots.txt”.
- You should see your current robots.txt file
- Now compare your robots.txt file with one that appeared in Google’s robots.txt Tool.
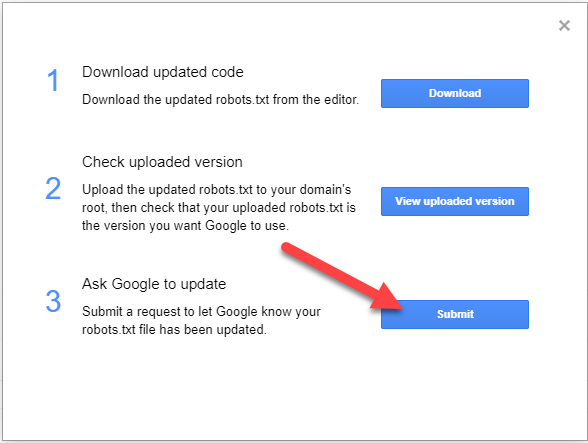
- If you are seeing an outdated version of robots.txt in Googles’s Tool click on “Submit”

- Then choose “Submit” in the popup window.
- Now wait about a minute and refresh Google’s robots.txt Tester page.

- If there are no errors or logic warnings on your robots.txt file, at the bottom of Tester tool you will see this:
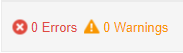
- If any syntax errors(1) or logic warnings(2) will be detected you will be informed with corresponding marks next to a line(3) in the Tester tool.


If any mistakes will be detected you have to edit your robots.txt file using any method covered in this SOP and repeat the validation step at the end.
- After editing and submitting your robots.txt file you can test your URLs in the text input box below Tester tool. Simply enter the desired URL and press “Test”.

This is it. Now search engines can search throughout your website content
but on your own terms. This is your website so you make the rules.
Ready to Transform Your Productivity?
At Lil Assistance, we've perfected the art of virtual assistant partnerships. Our flexible team model means you get the right specialist for every task, managed by experienced project managers who ensure quality and consistency.
Get Started with Your VA Team