| 🎯 What’s the goal? Add Local Business Markup to your Homepage | ⚠️ Why does it matter? This markup is used in SEO to help appear in the SERPs for answer boxes, carousels, and other rich snippets that can be generated by this markup. |
| 🏁 What’s the result? Local Business Schema Markup implemented on your Homepage. | ⌚ When do you do this? Ideally, as soon as you launch your website. |
| ✅ Any special requirements? Access to your WordPress Admin Panel. | 🙋♂️Who should do it? People in charge of managing your website. |
👉 Where this is done: In the WordPress Admin Panel.
⏳ How long will this take? about 30 minutes
Let’s get started, with these Local Business Markups
Your business should get a better exposure in the SERP

Environment setup:
- We recommend that you use Google Chrome browser to navigate the web.
Note that if you have a Google My Business account, all data you put in the following methods should be the same as your Google My Business data.
Creating Structured Data Markup using Google Tool
and installing it manually on your WordPress website
Creating your Schema Markup
- Open Google Structured Data Markup Helper.
- Once you open it, select “Local Business”.

- Enter your site URL and click on “Start Tagging”.

- The tool will load your website and on the right side,
you will see the “My Data Items” list. This is data you can tag.
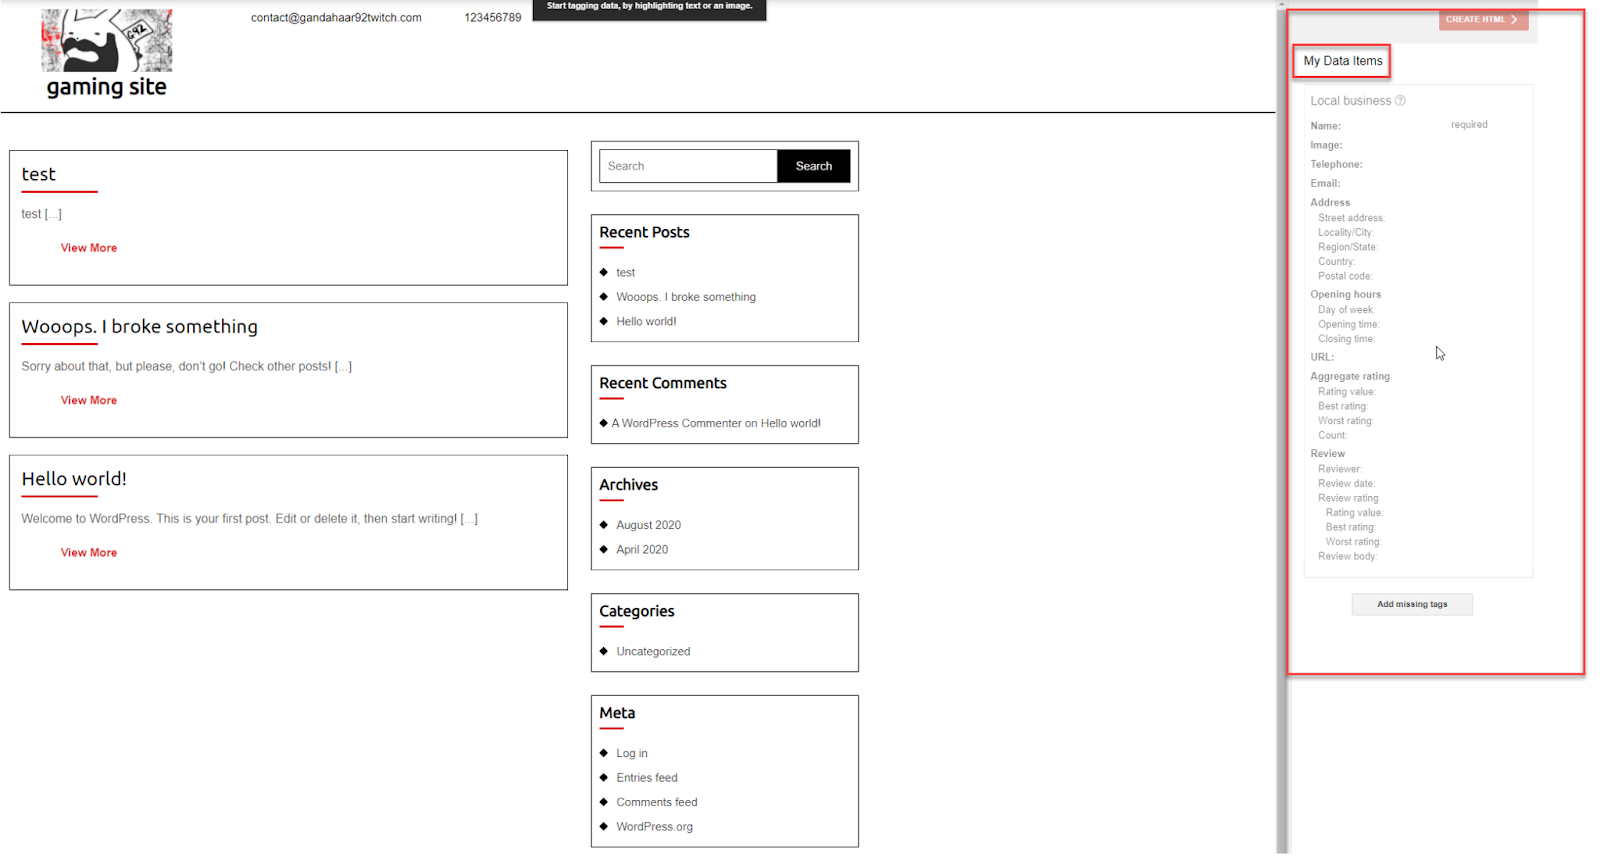
- Start by tagging your business name. Simply select it with your mouse left click and select “Name” from the drop-down menu.

- You should see that your business name appeared in the “Name” section of the “My Data Items” list on the right side of the screen.

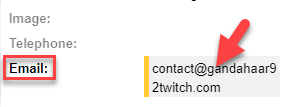
- Let’s do the same for the email address. Mark it with your mouse and choose “Email” from the drop-down list.

- Now you should see that the email address appeared in the “Email” on the right side of the screen.
- Click on your logo and select “Image” from the drop-down list to select your business logo.

- Now you should have your business basic data added to the “My Data Items” list.

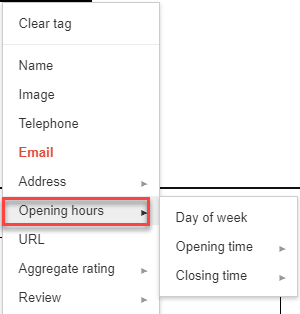
- If you have your business “Address” on your homepage, tag it using the same method as above.

- Do the same for other data, such as “Opening hours”.
- If you don’t have your address or any other data that you want to add to your homepage, don’t worry. Simply click on “Add missing tags”.

- A pop-up window will show up.

- Simply select the data type you want to tag from the drop-down list.
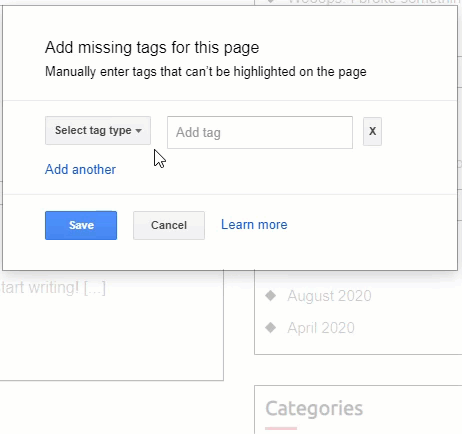
- Then type your value in the box.

- Add as many missing tags as you want.

- Once you finish adding your tags, click on “Save”.

- Missing tags you have just added should now be visible on the “My Data Items” list.

- Click on “Create HTML” in the upper right corner.

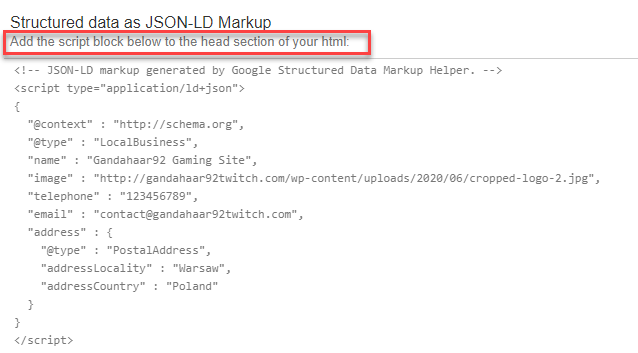
- This will produce a piece of HTML script you should put on your website.
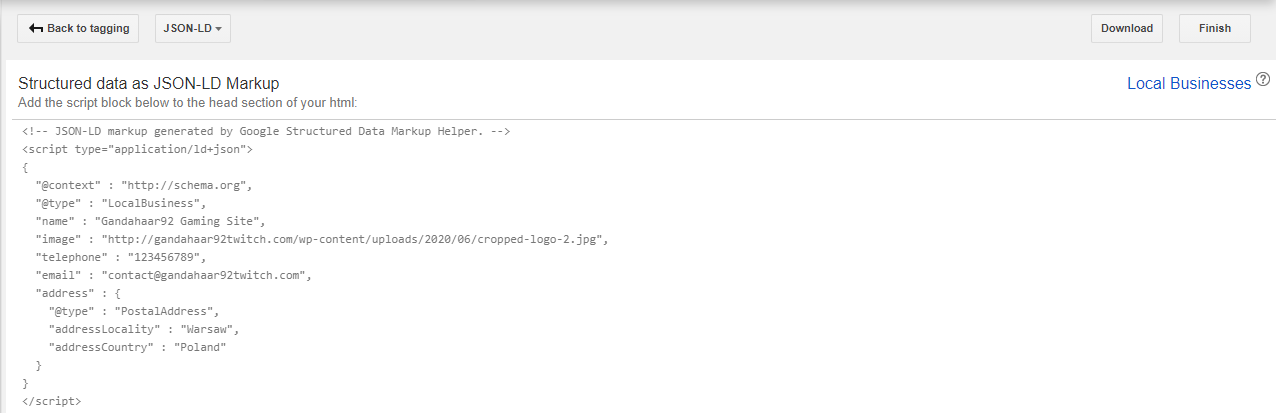
- You should place it in the header of your site.
Adding the script to your site
- Copy the whole script.

- Go to your WordPress Admin Panel.
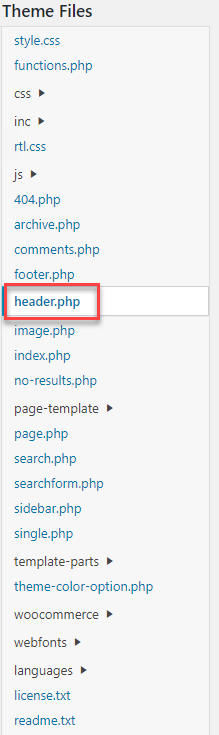
- In the “Appearance” section of the left side menu, select “Theme Editor”.

- Once the editor is open, go to “header.php”.
- Then, paste the script just below “</head>”.

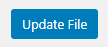
- Finally, click on “Update File”.
Add local business markup using WP Structuring Markup Plugin
- Log in to your WordPress Admin Panel.
- From the “Plugins” section of the left side menu, select “Add New”.

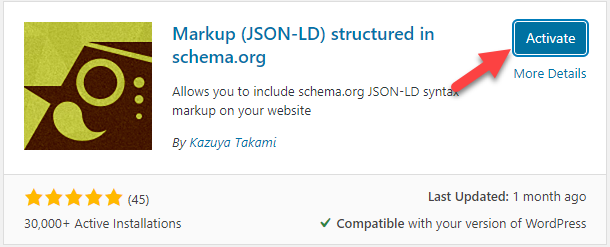
- Type in “Markup (JSON-LD) structured” in the search box.

- You should find the “Markup (JSON-LD) structured in schema.org” Plugin by Kazuya Takami in the search results.

- Click on “Install Now”.

- Then on “Activate”.
- A new section called “Schema.org Settings”, will appear in the left side menu of your WordPress Admin Panel.

- Click on “Schema.org List”.

- You will see a list of available markups.

- Mouse over Local Business markup and click on “Edit”.

- Start off by selecting checkboxes next to “Enable” and “Homepage”.

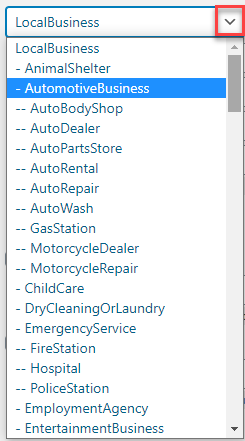
- Then, fill in with some basic data like Business Name(3), Name for your logo (2), URL of your business site(4) and phone number to reach your business(5). Make sure that “Local Business Type” is set to “LocalBusiness”(1).

You can select a specified business from the dropdown list
if you can find your business here.
- If your business is a food establishment, you can fill in the below sections, such as Menu URL (2), check if you accept reservations (3) and write what type of cuisine is served (4). If you want to enable this data, remember to select “Enable” by checking the box next to it (1).

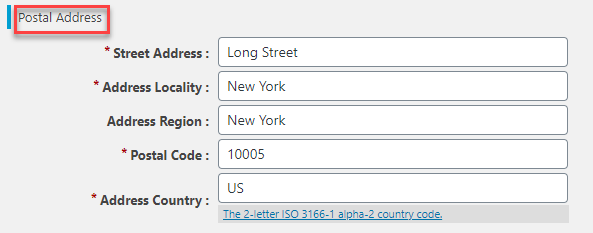
- Fill in the “Postal Address” section with the address information of your business.
- It is optional, but you can add “Geo Coordinates” of your business location.

To check the latitude and longitude of your business location, go to google maps and, when you place a pin on your address, you will be able to check those coordinates below it.

- Consider filling in “Opening Hours Specification” so your potential customers will know when they can visit your business. Check “Enable” next to each day you want to set opening time for and fill in with the appropriate time intervals.

Below you will find a different section for “Holiday Opening Hours”. Proceed the same way as above.

- You can fill in with the “Price Range” of your services.

- Once you fill in with all the data you want to tag, click on “Save Changes”.

- To check your Schema Markup, simply open your site in the browser. Then right-click on an empty space, and select “View page source”.

- You will be able to find your Schema Markup script at the top of the head section of the page.

Add local business markup using WPSSO Plugin
- Log in to your WordPress Admin Panel.
- From the “Plugins” section of the left side menu, select “Add New”.
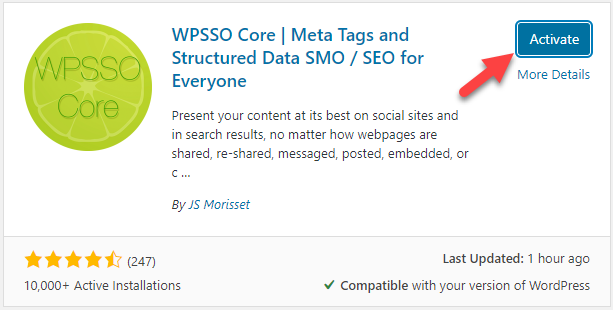
- Type in “WPSSO Place and Local SEO” in the search box.

- You should find two plugins in the search result and you should install both of them. First look for WPSSO Core | Meta Tags and Structure Data SMO / SEO for Everyone plugin by JS Morisset. Click on “Instal Now”.

- Then, “Activate” it.
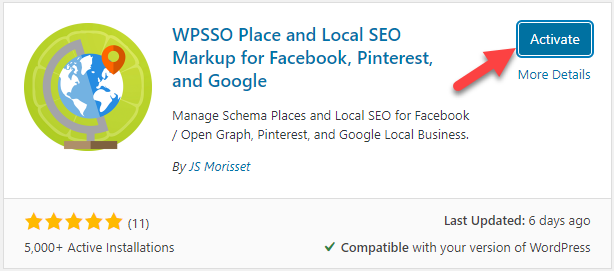
- The second one, you are looking for is WPSSO Place and Local SEO Markup for Facebook, Pinterest, and Google plugin. Click on “Install Now”.

- And “Activate” it.
- Now select “Installed Plugins” from the “Plugins” section of your WordPress Admin Panel left side menu.
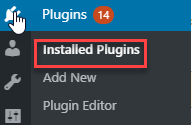
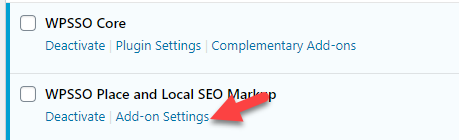
- Find WPSOO Place and Local SEO Markup on the list and click on “Add-on Settings”.
- Here you will be presented with the “Manage Places” tab.

- Make sure that Place Schema Type is set to “local.business”.

- If not, select if from the drop-down list.

- Now is time for you to put your business data. It is basically the same data that you used in the previous methods. An excellent feature of the WPSSO plugin is that, if you mouse over a symbol next to each box, information about what you should put in will be displayed.

The main data you should put is of course your business name, a short description of it and your business street address.
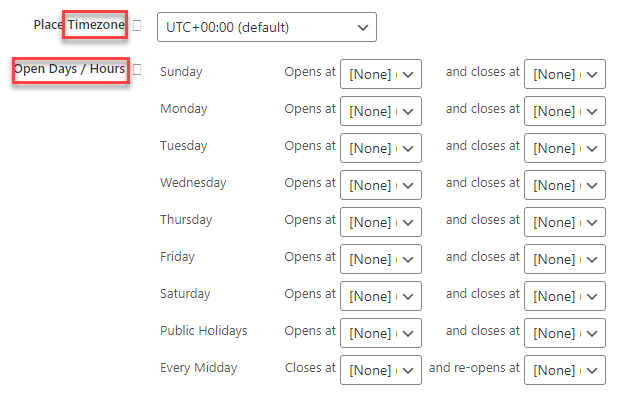
- Set “Open Days/Hours” of your business and select “Timezone”.
- Fill in with additional (optional) information. How far from your business location your services are available(1), what currencies you accept (2), types of payment that are available(3) and give your services price range(4).

- Click on “Save All Plugin Settings”.

Schema Markup results in higher quality traffic. Now, when you set yours, you should expect more visitors and hopefully higher income! Remember that On Page-SEO is important and things like Schema Markup is crucial for success.